売買シグナルの表示
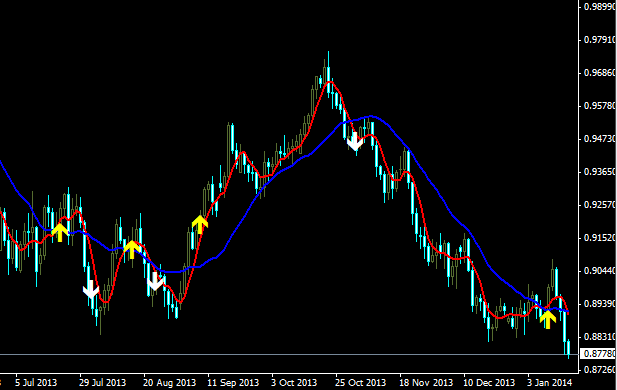
図の上矢印や下矢印で、条件を満たした際に、買いシグナルや売りシグナルを表示させる方法。
表示のためのポイントは下記2つかと思う。
・ポイント1
シグナル用のバッファを用意すること。
用意したバッファに、シグナルを表示させるポイント(価格の始値など)を格納する。
・ポイント2
指標スタイルをシグナル用のバッファに対して設定すること。
SetIndexStyle、SetIndexArrowの使用。
初期化関数initまでで、ポイントは全て登場する。
#property copyright "Copyright 2013, graySpace999."
#property link      "http://d.hatena.ne.jp/graySpace/"

#property indicator_chart_window

#property indicator_buffers 4
#property indicator_color1 Red
#property indicator_color2 Blue
#property indicator_color3 Red
#property indicator_color4 Blue

#property indicator_width1 2
#property indicator_width2 2

double BufFastMA[];
double BufSlowMA[];

//ポイント1
double BufBuy[];
double BufSell[];

string fastMaIndexLabel = "Fast MA";
string slowMaIndexLabel = "Slow MA";
string buyIndexLabel    = "Buy";
string sellIndexLabel   = "Sell";

extern int fastMaPeriod = 5;
extern int slowMaPeriod = 20;

//+------------------------------------------------------------------+
//| Custom indicator initialization function                         |
//+------------------------------------------------------------------+
int init()
  {
   //Allocate Indicator Buffer
   SetIndexBuffer(0, BufFastMA);
   SetIndexBuffer(1, BufSlowMA);
   SetIndexBuffer(2, BufBuy);
   SetIndexBuffer(3, BufSell);

   //Set Indicator Label
   SetIndexLabel(0,fastMaIndexLabel);
   SetIndexLabel(1,slowMaIndexLabel);
   SetIndexLabel(2,buyIndexLabel);
   SetIndexLabel(3,sellIndexLabel);

   //Set Indicator Style
   //ポイント2
   SetIndexStyle(2,DRAW_ARROW,STYLE_SOLID,2,Yellow);
   SetIndexArrow(2,233);
   SetIndexStyle(3,DRAW_ARROW,STYLE_SOLID,2,White);
   SetIndexArrow(3,234);


   return(0);
  }
あとは、条件部分の計算をするだけ。
int start()
  {
   int counted_bars = IndicatorCounted();
   int limit = Bars - counted_bars;

   if(counted_bars == 0){
      limit -= slowMaPeriod;
   }

   for(int i=limit-1; 0<=i; i--){
     BufFastMA[i] = iMA(NULL, 0, fastMaPeriod, 0, MODE_SMA, PRICE_CLOSE, i);
     BufSlowMA[i] = iMA(NULL, 0, slowMaPeriod, 0, MODE_SMA, PRICE_CLOSE, i);
   }

   if(counted_bars == 0){
     limit -= 2;
   }
   for(i=limit-1; 0<=i; i--){
      BufBuy[i] = EMPTY_VALUE;
      if(BufFastMA[i+2] < BufSlowMA[i+2] && BufSlowMA[i+1] <= BufFastMA[i+1]){
         BufBuy[i] = Open[i];
      }

      BufSell[i] = EMPTY_VALUE;
      if(BufFastMA[i+2] > BufSlowMA[i+2] && BufSlowMA[i+1] >= BufFastMA[i+1]){
         BufSell[i] = Open[i];
      }
   }

   return(0);
  }
このコードは殆どこの本の通り。

FXメタトレーダー入門―最先端システムトレードソフト使いこなし術 (現代の錬金術師シリーズ 56)
- 作者: 豊嶋久道
- 出版社/メーカー: パンローリング
- 発売日: 2007/12/07
- メディア: 単行本(ソフトカバー)
- 購入: 2人 クリック: 41回
- この商品を含むブログ (14件) を見る
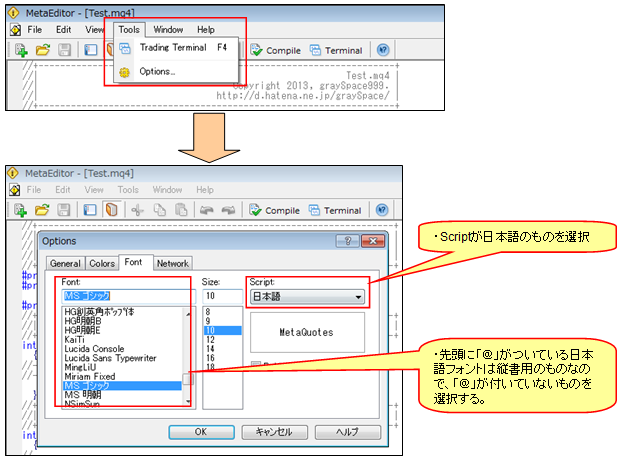
メタエディターでの日本語入力
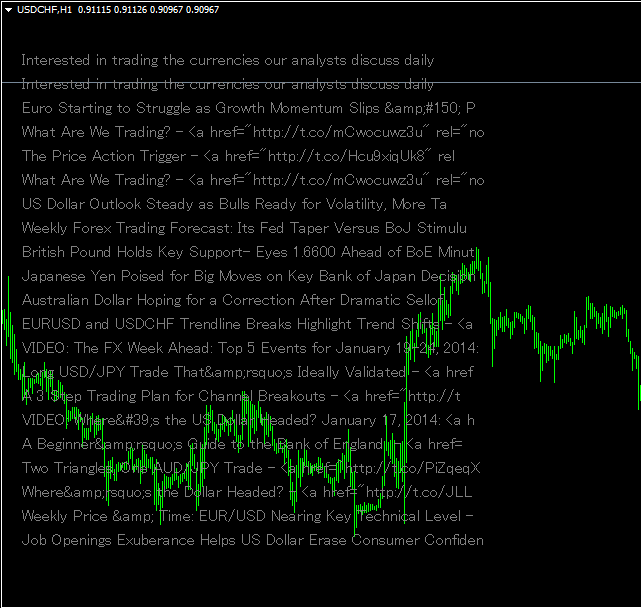
「Webから取得した文字列をMT4画面上に表示したところで文字化け(T_T)」で書いた問題を調べていたけど、エディターの日本語入力設定とは別問題だよな。
エディターの日本語入力設定のように、設定で文字化け直せたりできないのかな。
インディケーターの線の色や太さの設定 〜 プリプロセッサ命令
「インディケーターの線の色や太さの設定 〜 SetIndexStyle関数」では関数を使用して、インディケーターの線種や色を変更した。
プリプロセッサ命令でも可能なので、メモ。
これらを使用する。他にも色々あるけど、その他は適宜調べる。
#property indicator_buffers 1 //指標バッファ
#property indicator_color1 Red //線の色
#property indicator_style1 STYLE_SOLID //線種
#property indicator_width1 1 //線の太さ
サンプル。
#property indicator_chart_window
#property indicator_buffers 1          //指標バッファ
#property indicator_color1 Red         //線の色
#property indicator_style1 STYLE_SOLID //線種
#property indicator_width1 1           //線の太さ

//指標バッファ
double Buf[];

//+------------------------------------------------------------------+
//| Custom indicator initialization function                         |
//+------------------------------------------------------------------+
int init()
  {
//---- indicators
//Allocate Indicator Buffer
SetIndexBuffer(0, Buf);

//----
   return(0);
  }
//+------------------------------------------------------------------+
//| Custom indicator deinitialization function                       |
//+------------------------------------------------------------------+
int deinit()
  {
//----

//----
   return(0);
  }
//+------------------------------------------------------------------+
//| Custom indicator iteration function                              |
//+------------------------------------------------------------------+
int start()
  {
   int   counted_bars=IndicatorCounted();
   int   limit = Bars-counted_bars;

   for(int i=limit-1; 0<=i; i--){
      Buf[i] = (Close[i] + Close[i+1] + Close[i+2] + Close[i+3])/4;
   }

   return(0);
  }
//+------------------------------------------------------------------+
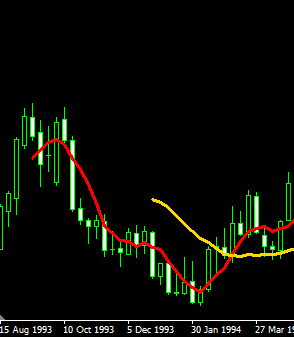
MT4のインディケーター作成プログラミングで線の太さを変更しても反映されない
「インディケーターの線の色や太さの設定 〜 プリプロセッサ命令」で線の色や太さを変更する方法を書いたが、線の太さが変わらなくなってハマった。
結論から述べると、線の太さが2以上の場合は、線の太さ種類が必ず実線になるようだ。
だいぶハマって豊嶋氏の本を読み込んでいたら、151ページに記載されていた。流石です。
これまでしっかり学んだわけでも無いのに、その上、間をあけてしまうとこういうことになるので、これも1から読み直している。

- 作者: 豊嶋久道
- 出版社/メーカー: パンローリング株式会社
- 発売日: 2013/07/15
- メディア: Kindle版
- この商品を含むブログ (1件) を見る
存在しないデータ部分を計算しない
データ開始部分はデータが無いため、インディケーターの表示がおかしい。
int start()
  {
   int   limit          =  Bars-IndicatorCounted();

   for(int i=limit-1; 0<=i; i--){
      Buf[i] = 0;
      for(int j=0; j<MA_Period; j++){
         Buf[i]  = Buf[i] + Close[i+j];
      }
      Buf[i]  =  Buf[i]/MA_Period;
   }

   for(i=limit-1; 0<=i; i--){
      Buf1[i] = 0;
      for(j=0; j<MA_Period1 ; j++){
         Buf1[i] = Buf1[i] + Close[i+j];
      }
      Buf1[i] = Buf1[i]/MA_Period1;
   }

   return(0);
  }
既に計算された指標バーがない場合は、それを計算から取り除く処理を施す。
int start()
  {
   int   limit          =  Bars-IndicatorCounted();
   //既に計算された指標がない場合は、 補正する。
   if(limit == Bars){
      limit = limit - (MA_Period -1);
   }
   for(int i=limit-1; 0<=i; i--){
      Buf[i] = 0;
      for(int j=0; j<MA_Period; j++){
         Buf[i]  = Buf[i] + Close[i+j];
      }
      Buf[i]  =  Buf[i]/MA_Period;
   }

   limit          =  Bars-IndicatorCounted();
   //既に計算された指標がない場合は、 補正する。
   if(limit == Bars){
      limit = limit - (MA_Period1 -1);
   }
   for(i=limit-1; 0<=i; i--){
      Buf1[i] = 0;
      for(j=0; j<MA_Period1 ; j++){
         Buf1[i] = Buf1[i] + Close[i+j];
      }
      Buf1[i] = Buf1[i]/MA_Period1;
   }

   return(0);
  }
インディケーターの線の色や太さの設定 〜 SetIndexStyle関数
インディケーター作って表示してみたけど、何も見えない。
線の色が背景色と同じだったから・・・。
//+------------------------------------------------------------------+
//| Custom indicator iteration function                              |
//+------------------------------------------------------------------+
int start()
  {
   int   counted_bars=IndicatorCounted();
   int   limit = Bars-counted_bars;

   for(int i=limit-1; 0<=i; i--){
      Buf[i] = (Close[i] + Close[i+1] + Close[i+2] + Close[i+3])/4;
   }

   return(0);
  }
//+------------------------------------------------------------------+
SetIndexStyle(0, DRAW_LINE, EMPTY, 2, Red);
を使用して線種、線の色、太さを指定する。
サンプルなのでstart()関数に書いているけど、init()に書くのが普通だと思う。
//+------------------------------------------------------------------+
//| Custom indicator iteration function                              |
//+------------------------------------------------------------------+
int start()
  {
   //Start Init
   SetIndexStyle(0, DRAW_LINE, EMPTY, 2, Red);
   //End init
   int   counted_bars=IndicatorCounted();
   int   limit = Bars-counted_bars;

   for(int i=limit-1; 0<=i; i--){
      Buf[i] = (Close[i] + Close[i+1] + Close[i+2] + Close[i+3])/4;
   }

   return(0);
  }
//+------------------------------------------------------------------+
配列に値を代入しているのに、常に0になってしまう。 〜 配列のサイズ変更ArrayResize
単純なバグだけど、ハマってしまった。
インディケーター作成を題材にMQL4の練習をしているときの話。
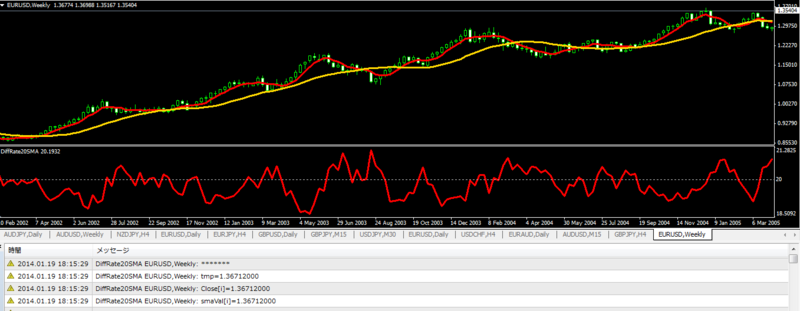
次のコードはローソク足の終値(Close[i+j])を、予め用意した配列smaVal[]と変数tmpに代入するだけのコード。このコードにはバグが有る。
#property indicator_separate_window
#property indicator_buffers 1

#property indicator_color1 Red
#property indicator_width1 3           //線の太さ
#property indicator_level1 20

extern int MA_Period  = 5;

double Buf[];
double smaVal[];
//+------------------------------------------------------------------+
//| Custom indicator initialization function                         |
//+------------------------------------------------------------------+
int init()
  {
   SetIndexBuffer(0,Buf);
   return(0);
  }
//+------------------------------------------------------------------+
//| Custom indicator deinitialization function                       |
//+------------------------------------------------------------------+
int deinit()
  {
//----

//----
   return(0);
  }
//+------------------------------------------------------------------+
//| Custom indicator iteration function                              |
//+------------------------------------------------------------------+
int start()
  {
   int limit = Bars - IndicatorCounted();

   if(limit == Bars){
      limit = limit -(MA_Period-1);
   }

   double tmp;
   for(int i=limit-1; 0<=i; i--){
      smaVal[i] = 0;
      for(int j=0; j<MA_Period; j++){
         smaVal[i] = Close[i+j];
               tmp = Close[i+j];
         Print("smaVal[i]="+smaVal[i]);
         Print("Close[i]="+Close[i+j]);
         Print("tmp="+tmp);
         Print("*******");
      }
      smaVal[i] =  smaVal[i]/MA_Period;

      //Print("****************"+smaVal[i]);
      Buf[i] = smaVal[i]/Close[i]*100;
   }

   return(0);
  }
結果を表示すると、tmpにはコピーされているが、smaValは常に0になってしまうバグが有ることが分かる。

「配列Bufと同じようにコピーしているだけなのに・・・。」と思いこんでいたが、よーく見直すと、配列smaValへ配列サイズを割り当てていない。
試しに、double smaVal[10000]として適当にサイズを割り当てると正常にコピーされる。
しかし、smaValのサイズは指標バッファ配列を使用して計算するため、予めサイズが分からない。このような場合、ArrayResize関数を使用する。
それで、ループを回す回数分だけ配列サイズを確保するように、 ArrayResize(smaVal,limit)をstart関数内に追記して出来た。
int start()
  {
   int limit = Bars - IndicatorCounted();

   if(limit == Bars){
      limit = limit -(MA_Period-1);
   }
   ArrayResize(smaVal,limit);

   double tmp;
   for(int i=limit-1; 0<=i; i--){
      smaVal[i] = 0;
      for(int j=0; j<MA_Period; j++){
         smaVal[i] = Close[i+j];
               tmp = Close[i+j];
         Print("smaVal[i]="+smaVal[i]);
         Print("Close[i]="+Close[i+j]);
         Print("tmp="+tmp);
         Print("*******");
      }
      smaVal[i] =  smaVal[i]/MA_Period;

      //Print("****************"+smaVal[i]);
      Buf[i] = smaVal[i]/Close[i]*100;
   }
   return(0);
  }
iMAOnArrayに関して疑問に思ったこと。理由は分かっていないけど。
MQL4のiMAOnArray関数で分からないことがある。
単に自分の使い方が間違っているだけだろうが。
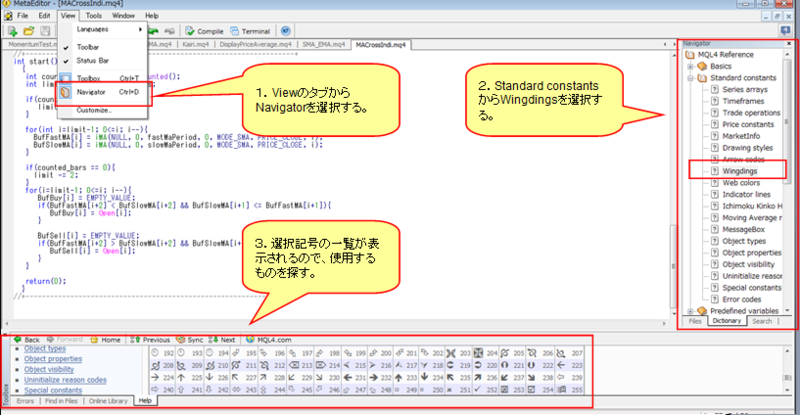
メタエディターのNavigatorのDictionaryからiMAOnArrayの説明を引用したのが下記。
double iMAOnArray( double array, int total, int period, int ma_shift, int ma_method, int shift)
Calculation of the Moving Average on data stored in a numeric array. Unlike iMA(...), the iMAOnArray function does not take data by symbol name, timeframe, the applied price. The price data must be previously prepared. The indicator is calculated from left to right. To access to the array elements as to a series array (i.e., from right to left), one has to use the ArraySetAsSeries function.
Parameters:
array - Array with data.
total - The number of items to be counted. 0 means whole array.
period - Averaging period for calculation.
ma_shift - MA shift
ma_method - MA method. It can be any of the Moving Average method enumeration value.
shift - Index of the value taken from the indicator buffer (shift relative to the current bar the given amount of periods ago).
これを見ると、array[]にはデータ配列を入れればいいので、終値を表すCloseをそのまま代入しても良いのかと思って次のように書いた。
#property indicator_chart_window
#property indicator_buffers 3
#property indicator_color1 Red
#property indicator_color2 Blue
#property indicator_color3 Gold

//Indicator buffer
double SmaBuf[];
double EmaBuf[];
double CloseBuf[];

extern int MA_Period = 20;
//+------------------------------------------------------------------+
//| Custom indicator initialization function                         |
//+------------------------------------------------------------------+
int init()
  {
   SetIndexBuffer(0, SmaBuf);
   SetIndexBuffer(1, EmaBuf);
   SetIndexBuffer(2, CloseBuf);
   return(0);
  }
//+------------------------------------------------------------------+
//| Custom indicator deinitialization function                       |
//+------------------------------------------------------------------+
int deinit()
  {
//----

//----
   return(0);
  }
//+------------------------------------------------------------------+
//| Custom indicator iteration function                              |
//+------------------------------------------------------------------+
int start()
  {
   int limit = Bars - IndicatorCounted();
   if(limit == Bars){
      limit = limit - (MA_Period - 1);
   }

   for(i=limit-1; 0<=i; i--){
   //Close配列をそのまま使用する。これでは上手くいかない。
      CloseBuf[i] = iMAOnArray(Close, 0, MA_Period+30, 0, MODE_SMA,i);
   }

   return(0);
  }
//+------------------------------------------------------------------+
Closeをそのまま使用するのではなく、一度CloseBufというバッファーに格納してからiMAOnArray関数を使用したら表示された。
#property indicator_chart_window
#property indicator_buffers 3
#property indicator_color1 Red
#property indicator_color2 Blue
#property indicator_color3 Gold

//Indicator buffer
double SmaBuf[];
double EmaBuf[];
double CloseBuf[];

extern int MA_Period = 20;
//+------------------------------------------------------------------+
//| Custom indicator initialization function                         |
//+------------------------------------------------------------------+
int init()
  {
   SetIndexBuffer(0, SmaBuf);
   SetIndexBuffer(1, EmaBuf);
   SetIndexBuffer(2, CloseBuf);
   return(0);
  }
//+------------------------------------------------------------------+
//| Custom indicator deinitialization function                       |
//+------------------------------------------------------------------+
int deinit()
  {
//----

//----
   return(0);
  }
//+------------------------------------------------------------------+
//| Custom indicator iteration function                              |
//+------------------------------------------------------------------+
int start()
  {
   int limit = Bars - IndicatorCounted();
   if(limit == Bars){
      limit = limit - (MA_Period - 1);
   }

   for(int i=limit-1; 0<=i; i--){
      //一度、Bufferに格納する。
      CloseBuf[i]  = Close[i];
   }

   for(i=limit-1; 0<=i; i--){
      CloseBuf[i] = iMAOnArray(CloseBuf, 0, MA_Period+30, 0, MODE_SMA,i);
   }

   return(0);
  }
//+------------------------------------------------------------------+
Comment関数はstart関数内に複数回書いても最後の1行だけが実行される
start関数内に次のように複数回Commentを書いても、最後に書いた1行しか表示されない。
int start()
  {
   //Comment
   Comment("Adk=", Ask, ",   ","Bid=", Bid);
   Comment("LocalTime:  ", TimeToStr(TimeLocal()));
   Comment("ServerTime:   ", TimeToStr(TimeCurrent()));

   return(0);
  }
次のように、Commentは1度だけ書いて、改行コード"\n"で区切って表現する。
int start()
  {
  Comment("Adk=", Ask, ",   ","Bid=", Bid,"\n", "LocalTime:  ", TimeToStr(TimeLocal()),"\n","ServerTime:   ", TimeToStr(TimeCurrent()));

   return(0);
  }
